Showing posts with label Wrapping Paper. Show all posts

Wednesday, 8 January 2014

New Year New Products

Here are a few exciting snaps of around the warehouse of just some of the new products you will see early 2014
Eboy Wrap
Eley Kishimoto Wrap
Fathers Day Cards
Eley Kishimoto Wrap
Grafika Wrap
Mini Cards by Sunsuke Satake 
Eley Kishimoto Wrap
Eboy Wrap
Eley Kishimoto Wrap
Eboy Wrap
Eboy Wrap
New Notebooks
New Foiling Machine
and of course Basil!!!

Monday, 15 July 2013

The Competition Winner is Announced

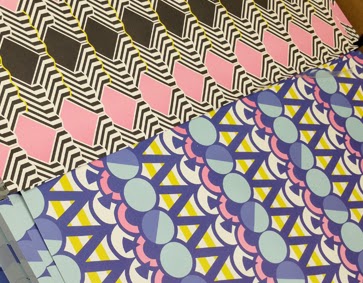
We had such an amazing response to our Design a Wrapping Paper Competition, with so many of you talented illustrators out there submitting fantastic designs, it was a shame that we could only have 1 winner. We found it really tough to choose the winning design but after 2 weeks of contemplating and arguing, we finally came to a decision. A massive CONGRATULATIONS to Anna Dunn for designing this eye catching illustration which will be printed and made into wrapping paper and be in shops real soon!!!!!!!!


We didn't plan to have any runners up but we have chosen a few designs which were our favourites and each of you will receive a 1973 goodie bag. Thank you for all your entries and look out for the next competition we will be running at the end of the year. Keep drawing!!!!!!!!!!!!


By Barney

By Esther Cox

By Esther Cox

By Izabella Markiewicz

By Kate Ball

By Lou Taylor

By Mi Jung Lee

By Ruth Craddock

By Ashmi Shah

By Eloise White


Tuesday, 4 December 2012

Featured!! The Independent.

Our Woodland gift wrap was featured on The Independent website. Check out our wrap along with 9 other festive papers here

Thursday, 6 September 2012

Featured!! Living Etc.

In their recent '50 of the Best' editorial Living Etc featured several of our gift wraps framed. This technique is a great and inexpensive way to decorate your walls. By using a NYTTJA  frame from Ikea you could get a wall filler for under a £10.00.


Friday, 20 April 2012

Back in Stock!! Sanna Annukka.

Due to popular demand the Sanna Annukka Navajo Pink wrap is now back in stock. Get yours HERE

Thursday, 23 February 2012

Grafika Collaboration. Part 2.

This week we bring you three more pieces by some of the talented artists who participated in our Grafika Collaboration. 


Hannah Ashwell - www.bymi.co.uk
The neon pinks and oranges inspired me to head back to my childhood in the eighties and I experimented with various foldings to create abstract shapes using differently folded and textured squares. In the end, a miss spent youth also provided the genesis for the basic unit: the fortune teller that predicted your future husband or career depending on the number of times it was opened and closed. Immediately this 4 pointed spike with a square silhouette suggested pixels and from there I arranged the squares to create those icons from the past Space Invaders.


Lucy Driscoll - www.lucydriscoll.com
I love the bold shapes & colours of the Grafika paper, & have turned them into abstract landscapes with the help of an 80s Blue Peter Annual!  I had great fun making them!


Ben Everett -  www.beneverett.wordpress.com
Since college I have been fascinated by the way animals live and the insides of their secret homes and multiple maze tunnels. I wanted to create a retro home for the unpleased looking rabbit, I love the expression on his face and thought he looked rather miffed off about something. He is a character that somes up people of today (he has a whole pile of carrots infront of him, yet is still unsatified and wants more from life)

Tuesday, 14 February 2012

Paper Craft: Clover Box.

These super cute and very easy boxes are perfect for little gifts.

You will need: The net, scrap paper, scalpel, double sided tape, and cello-tape.

 1. Cellotape the net and scrap to the cutting board.
 2. Using the scalpel cut around the net carefully.
 3. Separate the two nets. 
 4. Using the original net as a template start folding the crease lines. 
 5. Once all lines are creased (including the stick tabs) your net should look like this.
 6. put double sided tape on the outside of the tabs and stick. 
 7. Once the net is made up it should look like this. 
 8. Then link the clover 'leaves' one by one clockwise till you are left with a Clover.